
This guide describes how to add a user to Google Search Console (GSC). This is a fairly common task faced by SEOs.
In addition, we will also learn how to remove a user from your GSC.
Please note: this guide assumes that you’ve already set up GSC for your website.
How to add a user to Google Search Console
Select your website
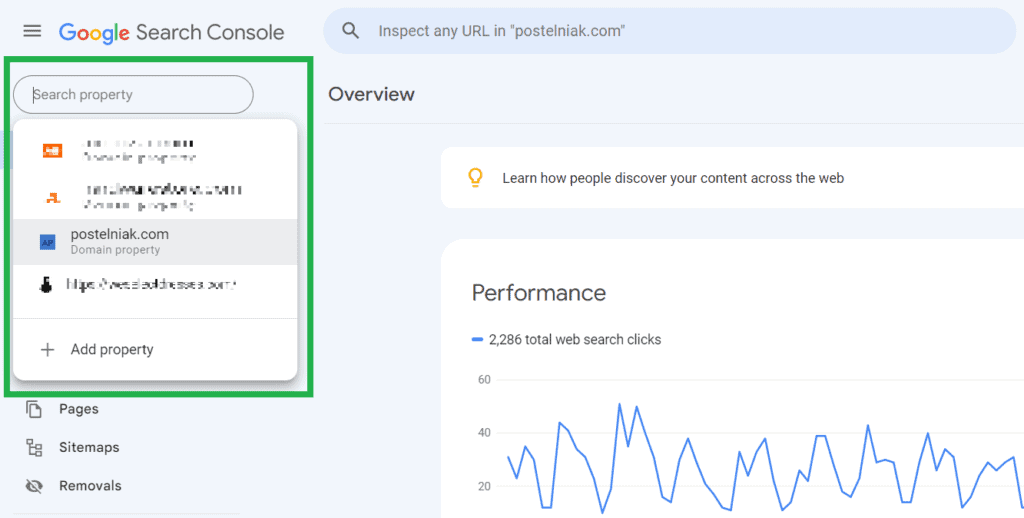
The first step is to sign in to your Google Search Console account and select the necessary website.
You can select a website from the “Search property” dropdown in the top left corner:
Open “Settings”
Scroll down the page and click on “Settings” in the left pane:

Select “Users and permissions”
In the settings select “Users and permissions”:

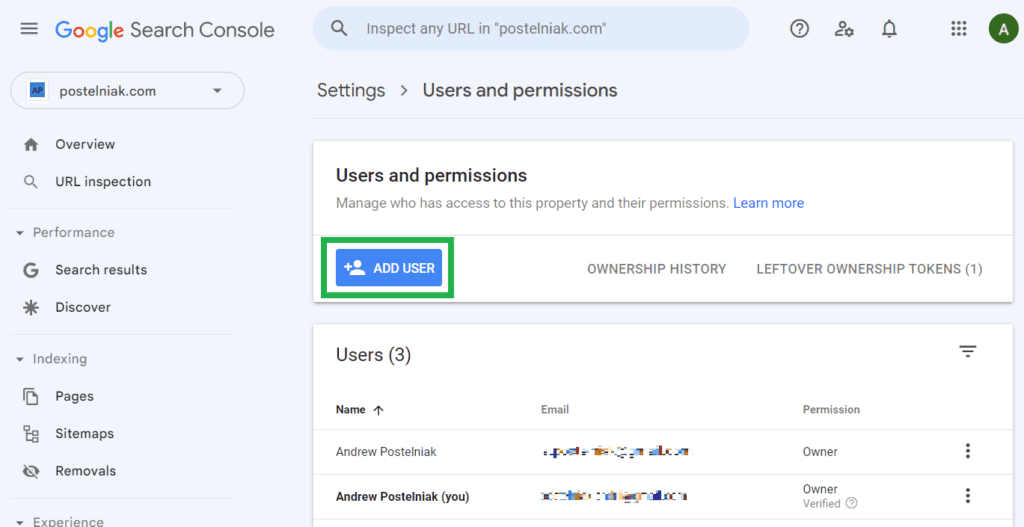
Select “Add user”
In the “Users and permissions” page select the “Add user” button:
Enter the user’s email address
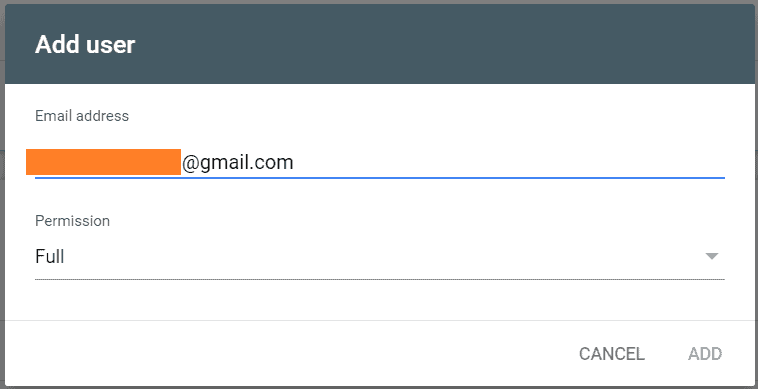
In the “Add user” window, enter the email address of the user:
Please note: the user must have a valid email associated with their Google account.
Choose the desired permission level
In the “Add user” window, you will also see the “Permission” field with three options:
- Owner
- Full
- Restricted

An owner can manage other users’ access, customize settings, access all data, and use all available tools. There are two types of owners: verified and delegated.
A verified owner is someone who verified site ownership in one of the ways (HTML file upload, adding Google Analytics tracking code, etc.) A search console property can have only one verified owner.
A delegated owner is someone who has been designated as such by the verified owner.
Users with full access can configure some settings, access all data, and use most tools. However, full users cannot add, remove, or change the permission level of other users.
Restricted users can only view data and reports, but cannot manage users and their permission level.
Select the desired option and click “Add”. That’s it – you’ve added a new Search Console user.
How to remove a user from Google Search Console
There are also situations when you may need to remove a user from your GSC. Here is what you need to do.
Open “Users and permissions”
Select the necessary website in GSC, open “Settings”, and select “Users and permissions” (see screenshots above).
You’ll see a list of all users who have access to your GSC:

Select the user and remove their access
Navigate to the desired user and click on the 3 vertical dots on the right side:

Select “Remove access”. Here you can also change the user permission level.
Leftover ownership tokens
In the “Users and permissions”, you may also find leftover ownership tokens:

These are the remaining objects (CNAME records, HTML files, etc.) used by previous owners to verify their ownership.

As long as these leftover ownership tokens remain, old verified owners can regain access to the property.
For example, someone verified ownership of your site in GSC in the past. After that, you became the verified owner and removed access for them. However, if you don’t remove leftover ownership tokens, old owners can regain access to your GSC.
So if you want to prevent regaining access, click “How to remove” and follow the instructions, which may look like this:

I hope you found this short guide useful and that you can now add and remove a user in your Google Search Console.
If your site runs on WordPress, you may also want to check out how to improve Core web vitals.