This guide describes how to add a user to Google Analytics 4 (GA4). This is a fairly common task faced by SEOs and other digital marketers.
We will also learn how to delete a user from your Analytics.
Please note: this guide assumes that you are already using Google Analytics 4 and have it set up on your site.
How to add a user to Google Analytics 4
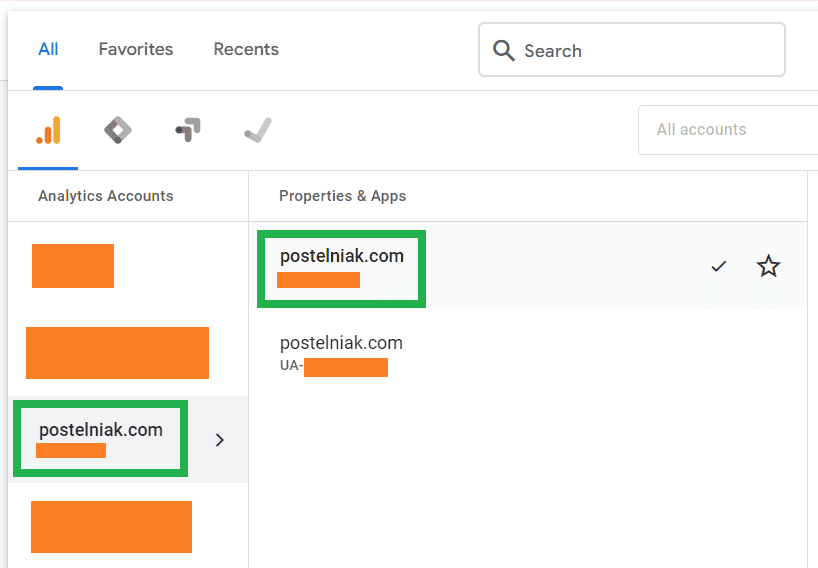
Select your website
To begin, log into your Google Analytics account and select the website to which you would like to grant access:
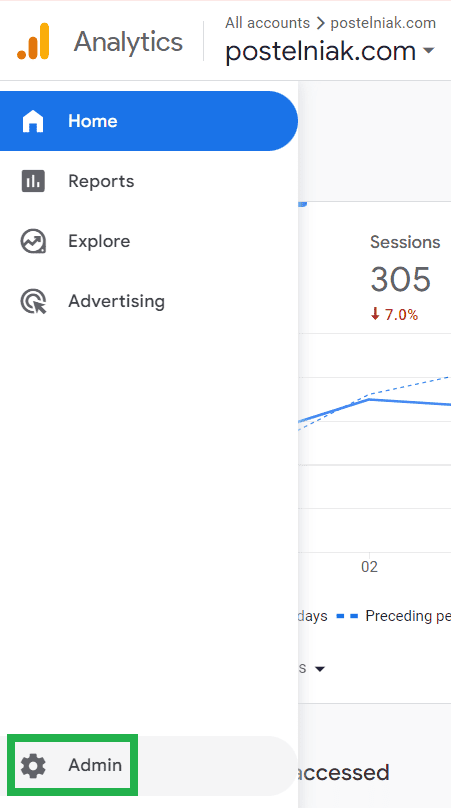
Open “Admin”
Scroll down the page and click “Admin” in the lower left corner:
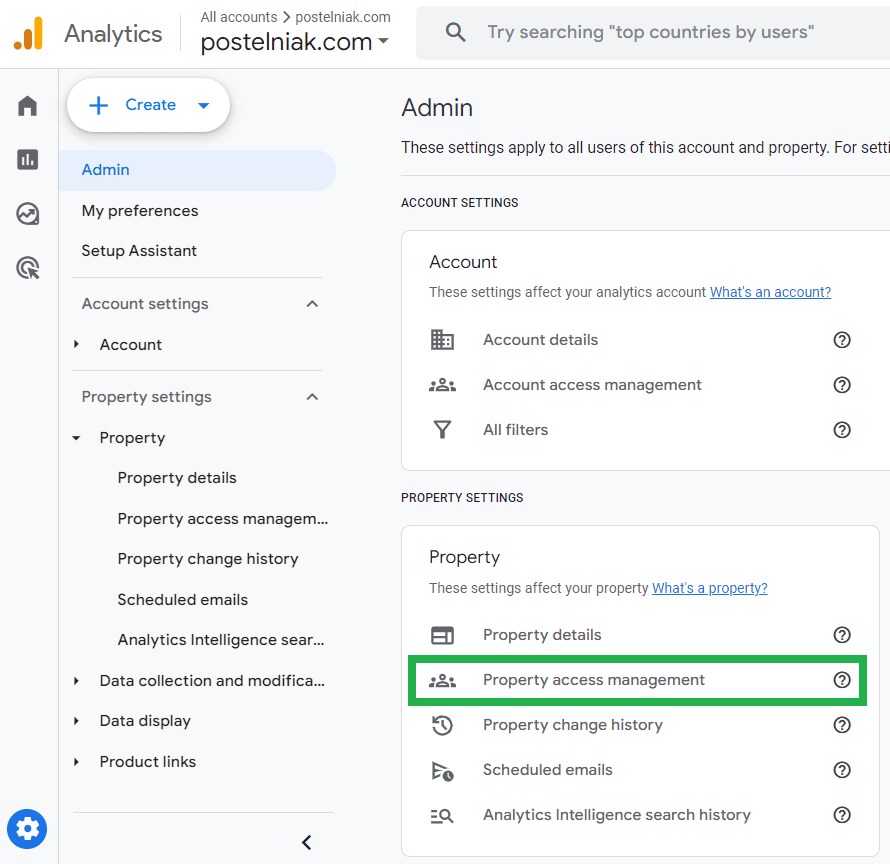
Select “Property Access Management”
Go to the “Property” settings and click on “Property Access Management“:
Select “Add users”
Click on the blue circle with a white plus inside and select “Add users”:

Enter the user’s email address
In the “Add roles and data restrictions” window, enter the email address of the user:
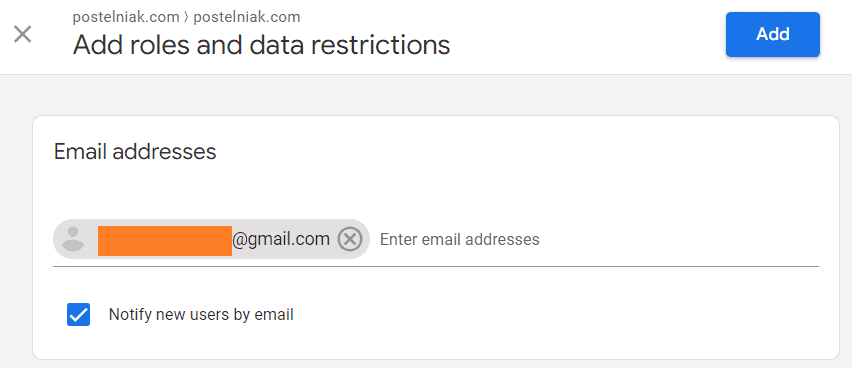
Please note: the user must have a valid Google account email address.
Select the desired user role
In the “Add roles and data restrictions” window, you will see the “Direct roles and data restrictions” section. This section includes the following user roles:
Administrator. Has complete control over Analytics at the account level, including managing other users.
Editor. Can edit property-level settings but cannot manage other users.
Marketer. Can manage audiences, conversions, attribution models, events, and conversion windows.
Analyst. Can manage certain property assets and collaborate on shared assets.
Viewer. Can only read and analyze data and modify data appearance in reports.
None. It is not entirely clear why such a level of access is needed. Google documentation states that the user does not have a role in the current resource. However, they may have a role for another resource.
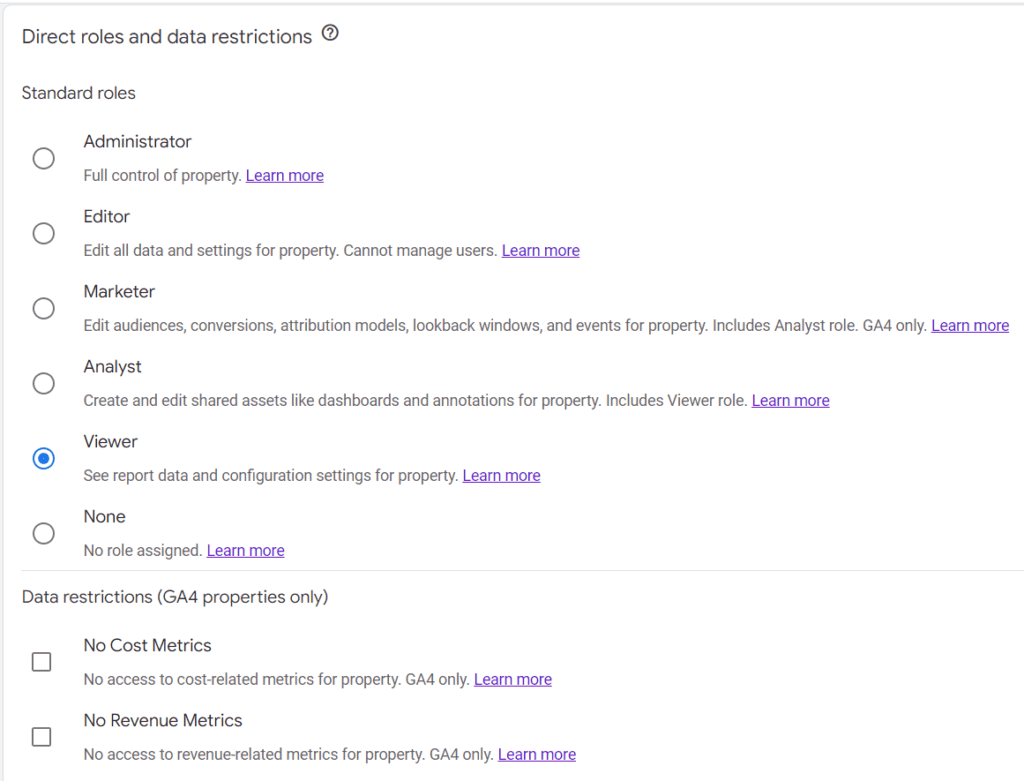
Here you may also set data restrictions:
No Cost Metrics: unable to view any metrics associated with cost. They will not be visible in reports, insights, etc.
No Revenue Metrics: unable to view any metrics related to revenue. They will not be visible in reports, explorations, audiences, etc.
Select the desired option and click “Add” in the top right corner. That’s it – you’ve added a new user to your Analytics.
How to delete a user from Google Analytics 4
There are also situations when you may need to delete users from your Analytics. Let’s see how to do it.
Open “Property Access Management”
Select the necessary website in Google Analytics, open “Admin”, and select “Property Access Management“ (see screenshots above).
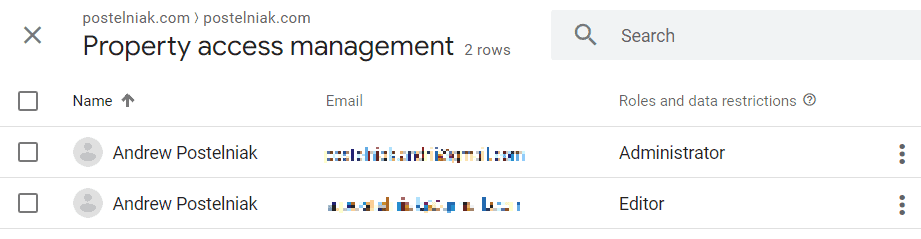
You’ll see a list of all users with access to your Analytics, along with their roles:
Select the user and remove access
Go to the user you want to remove access to and click on the 3 vertical dots on the right:
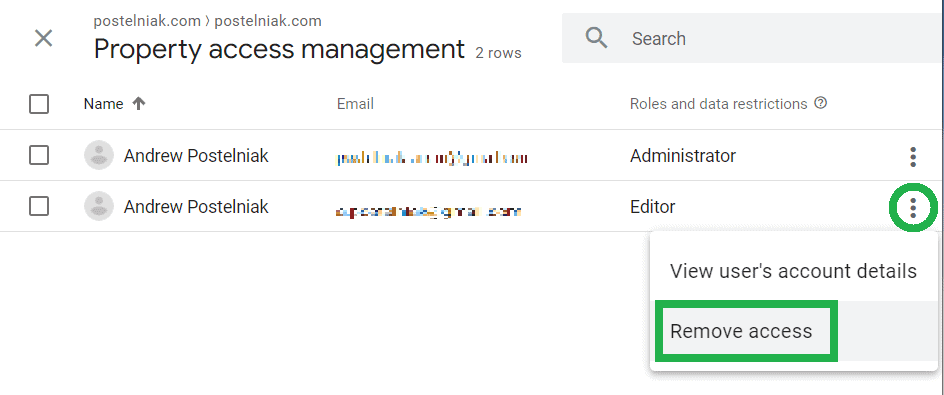
Select “Remove access” – and you are done.
Best practices
Here are some best practices for user management in Google Analytics:
- Choose the user access level carefully. When you add users, grant only the necessary level of access to complete their tasks.
- Regularly review user permissions. Review and update user permissions as your team or clients change.
- Track user changes. If your Google Analytics users make any changes, ask them to let you know.
I hope this short guide was helpful. Now you can add, delete users, and manage their roles in your Google Analytics account.
You might also want to look at how to add a user to Google Search Console.