In this article, we’ll take a detailed look at how to create and add Schema markup in WordPress. We’ll also learn what Schema markup is and why it’s important.
What is Schema Markup?
To understand what Schema markup is, we first need to understand what structured data is. Structured data is a way to organize information about a web page in a standard format so that search engines can understand the web page better.
Structured data implemented with Schema.org vocabulary, is called Schema markup, or just Schema.
In the past, other vocabularies were also used to create structured data, such as data-vocabulary.org. But now they are all deprecated and Google only uses Schema.org.
That is why the terms “Schema markup” and “Structured data” are often used interchangeably.
Why you need Schema markup
There are three main advantages of using Schema markup.
First, it helps search engines better understand the page’s content and better match the page with the relevant search queries.
For example, if you add Restaurant Schema to a restaurant’s website, the restaurant is more likely to appear in relevant search results.
Second, it helps Google to display your page with enhanced elements in search results, also known as “rich results” or “rich snippets”.
For example, if you add Product markup to a page, the page will appear in search results with rich snippets, like this:

Third, Schema markup is important for AI because it provides a machine-readable language that helps AI systems understand and interpret content more accurately. So if you add relevant Schema to your page, it’s more likely to appear in AI-generated search results.
How to create Schema markup
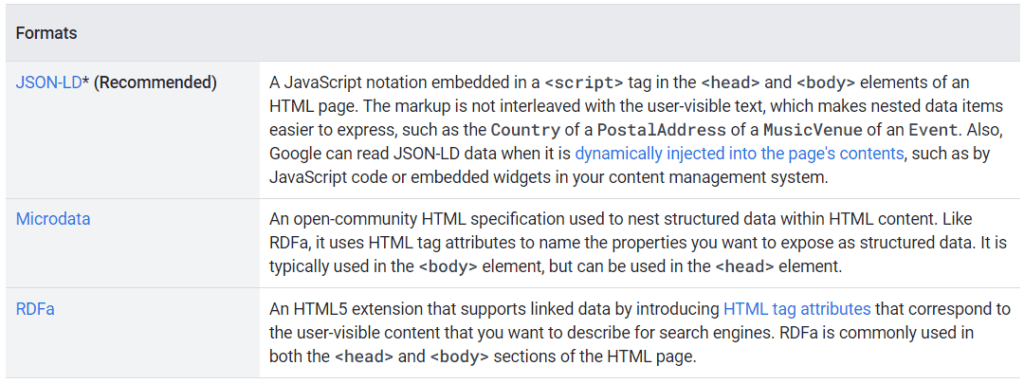
You can create Schema using three formats – JSON-LD, Microdata, and RDFa. Google recommends using JSON-LD format:
Schema markup can be created using either Google documentation or online tools. Let’s consider both methods.
Using Google documentation
The process includes three main steps:
- Identify the necessary Schema type.
- Find the necessary template.
- Modify the selected template to fit your page.
Let’s look at each step in more detail.
Find the necessary template
Google supports many structured data types – Article, Local Business, Recipe, Product, FAQ, etc. The full list of supported types can be found here.
The good news is that you do not need to write code from scratch. You just need to find the necessary template and click “Get Started”:

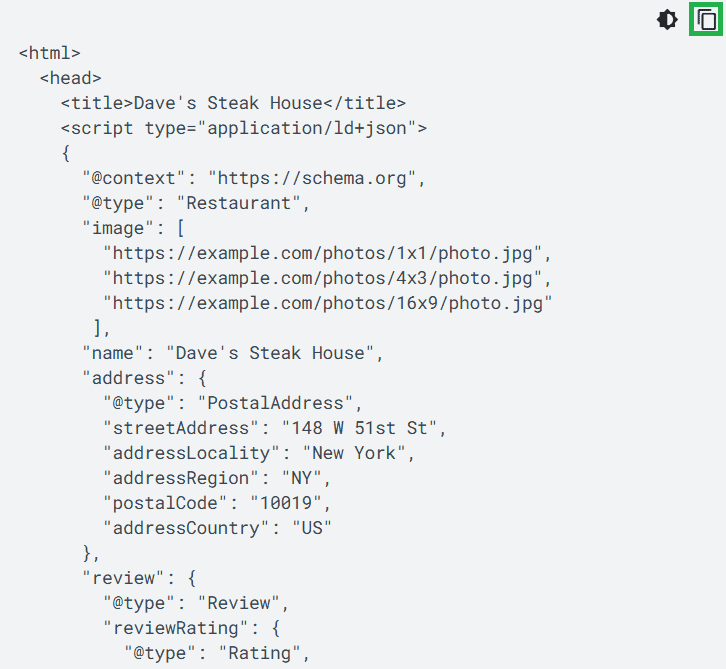
Scroll down the page and you’ll find the code sample that you can copy:
Modify the selected template to fit your page
Before editing the code, we first need to understand how the JSON-LD format is structured. In this format, structured data is encoded as follows:
"attribute": "value"
Different attributes are separated by commas and are written on a new line. If one attribute has several values, then square brackets [ ] are added to enumerate all values of the attribute.
For example, the following attribute image has several values:
"image": [
        "https://example.com/photos/1x1/photo.jpg",
        "https://example.com/photos/4x3/photo.jpg",
        "https://example.com/photos/16x9/photo.jpg"
       ],
If an attribute has other attributes (subattributes), then curly braces { } are added to list them. For example, the following address attribute has subattributes such as streetAddress and addressLocality:
   "address": {
      "@type": "PostalAddress",
      "streetAddress": "Street and building number",
      "addressLocality": "Your city",
      "postalCode": "10000",
      "addressCountry": "US"
    },
To modify the selected template, you need to change the values of the corresponding attributes and add/delete other attributes (if necessary).
Let’s look at an example.
Suppose you need to create the Dentist markup. In Google documentation, we can only find a template for Restaurant. Therefore, we need to modify this template accordingly.
First of all, remove all the attributes that do not apply to Dentist, such as menu and servesCuisine. If the page does not contain reviews, you also need to remove the review attribute.
After that, you need to modify the values of the other attributes – type, name, URL, telephone, openingHoursSpecification, etc.
For example, if you want to change the type from Restaurant to Dentist, you need to replace
"@type": "Restaurant"
with
"@type": "Dentist"
The same for other necessary attributes.
This way you will get the final version of the code, e.g.:
{
   "@context": "https://schema.org",
   "@type": "Dentist",
   "image": "https://dentist.example.com/myphotos/1",
   "@id": "https://dentist.example.com",
   "name": "Your Company Name",
   "address": {
      "@type": "PostalAddress",
      "streetAddress": "Street and building number",
      "addressLocality": "Your city",
      "addressRegion": "IL",
      "postalCode": "10000",
      "addressCountry": "US"
    },
   "url": "https://dentist.example.com",
   "telephone": "+1234567890",
   "priceRange": "$$-$$$",
   "openingHoursSpecification": [
     {
       "@type": "OpeningHoursSpecification",
       "dayOfWeek": [
         "Monday",
         "Tuesday",
         "Wednesday",
         "Thursday",
         "Friday"
         ],
       "opens": "10:00",
       "closes": "19:00"
     }
   ]
 }
Using online tools
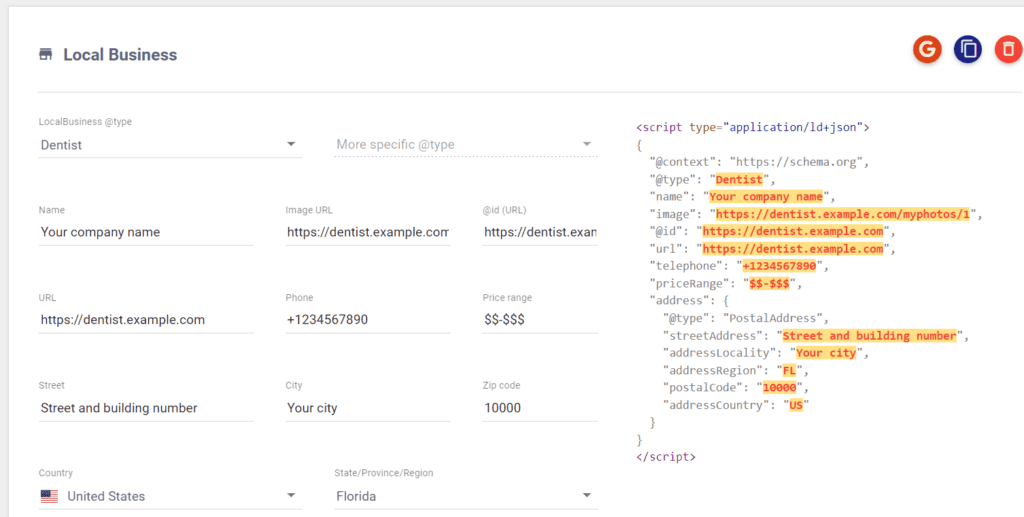
Many online tools allow you to generate Schema, such as Schema Markup Generator. The main advantage of such tools is that you don’t need to modify any code.
You just need to choose the necessary Schema type and enter the values of the corresponding attributes.
The tool will generate the necessary code and you can even test it right away:
Such markup generators support all the most commonly used types, but not all types listed in the Google documentation.
For example, if you need to create SoftwareApplication markup, you need to use Google documentation.
Test the markup in the Rich Results Test Tool
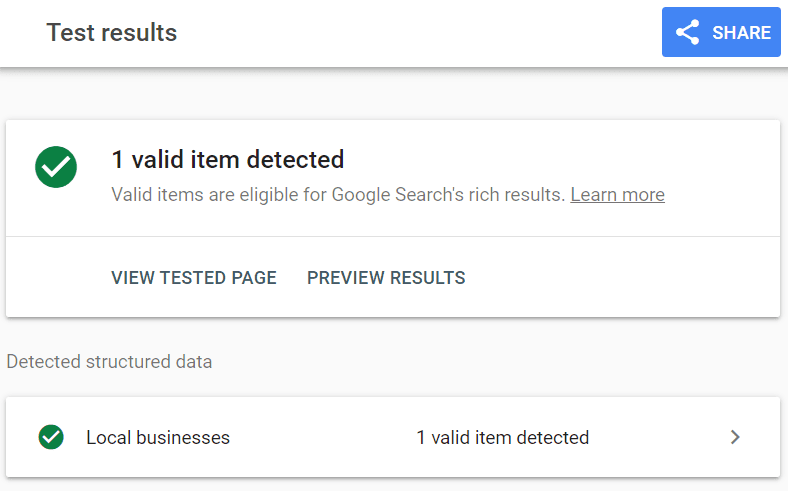
Test your code for possible errors/warnings in the Rich Results Test Tool:

If everything is alright, the testing tool will show you that your markup is eligible for rich results:
Now you can add it to the page.
How to Add Schema Markup Without a Plugin
Do NOT edit your header.php file
When you add Schema markup in WordPress, add it only to relevant pages (not site-wide). That’s why I don’t recommend you edit the header.php file as many other similar guides suggest.
If you add Schema to the header.php file, you will place the same markup on all pages of the website – this is incorrect.
It is technically possible to add rules to the header.php file so that markup appears on the necessary page, for example, using the is_page() WordPress function.
However, this work requires coding skills and basic knowledge of PHP and WordPress development. If you make even a small error, it could break your website’s header.
Use Custom HTML block
A much easier approach is to use the Custom HTML block in WordPress to add Schema markup to the necessary page.
Note: if you’re still using the Classic Editor, you’ll need to switch to the Block Editor (also known as Gutenberg). This might involve converting your existing content to blocks, but WordPress will guide you through the process.
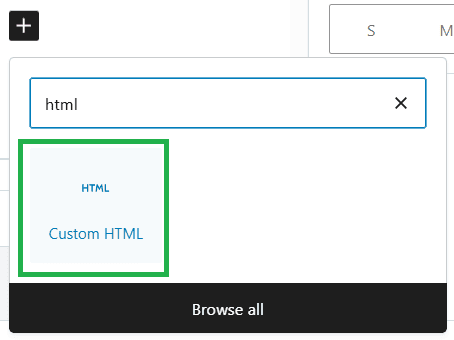
In the WordPress Block Editor, open the page you want to add the markup to, click “Add block”, type “HTML”, and select “Custom HTML”:
There is no difference where you add a new “Custom HTML” block – you can do it anywhere on the page or post.
Then paste the markup wrapped in the ‘script’ tag like this:
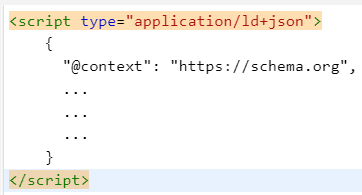
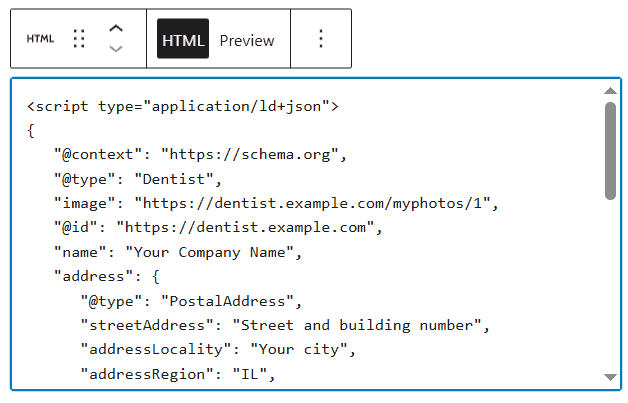
In the WordPress editor, it looks as follows:
Finally, save your changes and clear the page cache (if you use a caching plugin). Then run another test in the Rich Results Test Tool to ensure Google detected the added code on the live page.
How to Add Schema Markup With a Plugin
If you don’t want to use the Block Editor, you can use a WordPress plugin like WPCode or Header Footer Code Manager.
These plugins allow you to add custom code snippets to the site header. The plugin is only used to access the page header, not to create markup. So if you decide to use a WordPress plugin to add Schema markup, you will first need to create it as described above.
The above plugins are easy to use – you just need to select the snippet type (HTML), location (header), and page where you want to add the schema markup:
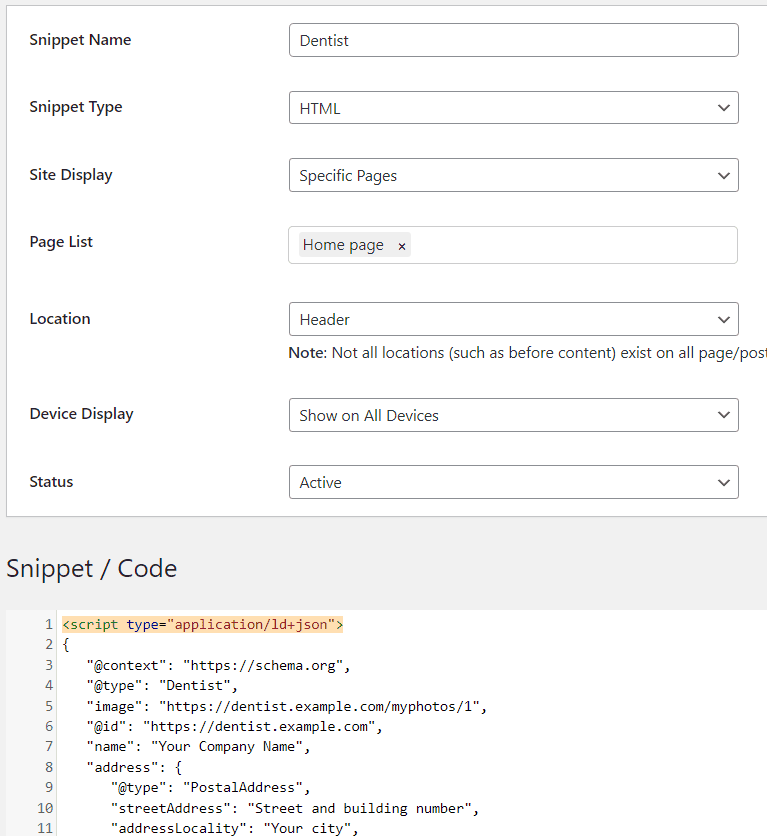
Then paste your markup wrapped in the ‘script’ tag to the appropriate field and save changes.
Conclusion
Schema markup is a powerful way to improve the appearance of your pages in search results and better explain the content of a page to search engines.
Creating and adding Schema markup in WordPress is not as difficult as it sounds. I hope I’ve been able to explain the whole process.
To gain more practical skills, you can also check out the guide on creating a Local Business Schema.